Wednesday, April 25, 2012
Bad weather and no honey!
I manages to get a quick look at my bees last sunday between the frequent rain showers. Not one single drop of honey in any of the 3 supers I had place on 2 weeks before.
The problem is we have had plenty of rain but the temperatures are still around or below 14 degrees making any appreciable forraging difficult. I have 3 fields of rape seed oil in full flower around my bees but the bees just cant get there and if they can, the temperature is so low the pollen in not ripe and the nectar flow is also low. When we do have a lull in the wind and the sun comes out there is for a few minutes a mad dash to the the nearest flowers. This results in huge clouds of bees suddenly appearing and the returning just before the next shower comes. Its actually a really interesting site to watch.
On the plus side the colonies are doing very well. They have all started drawing up the 1st and 10th frame that I swapped in the spring . This shows that the colonies need more space and are edging to the etremities of the hives to find it.
There is a large amount of brood in each hive . I think that my queens have been laying continously for the last 3 weeks. Its obvious therefore that there is plenty of food / pollen to supply the needs of the hive but there is not excess to start storing in the supers above.
I have decided I am going to remove my honey supers, allow my bees to become cramped and this will then enduce swarming. This time last year some of my hives had swarmed and then I artificially swarmed the others. Due to the amount of rain we have recieved its looking much more likely we will have a good nectar flow during the fowering of the chestnut trees, So I am hoping to artificially swarm all my colonies in the next week , create some bees and then leave the bees build back in numbers before the best quality honey comes along.
Artificial swarming.
For those of you who dont know very briefly, Artificial swarming is a technique employed by beekeepers during the spring and summer. It basically allows a beekeeper to create a new colony of bees for free and stop your bees from swarming at the wrong time..
Personally I dont usually collect spring honey and instead I let my bees build up in numbers in the spring and when they swarm or are about to swarm I go through my hives and artificially swarm them, making the bees think the queen has gone. The bees then, in their noble effort to save their colony take an egg less than 3 days old and feed it royal jelly exclusively and then produce a new queen. She then hatches out in 21 days and after she has run the gauntlett of mating flights she returns to the colony and starts laying eggs as the new queen This takes usually just over 3 weeks.
I will be doing a "how to perform an artificial swarm in my next blog." As usual you need to know all the nuts and bolts of the technique to get it right. I have done it fro the last 4 years and only started getting it right last year.
I will also be monitoring my bee traps around my colonies closely as a guide to how far advanced the preparations for swarming are, but this is really a guide and a lot depends on other factors.
Well its still howling and lashing with rain here. The promise of warmer weather for this week has changed to possibly next week and certainly nothing in the next 2 or 3 days but we must not forget this is normal weather for brittany, we have just been spoilt for the last 2 springs!


Wednesday, April 18, 2012
Making A Honey Super
Making a Honey Super
Well I have a bit of time on my hands( so to speak) as I had an accident with a chainsaw the week before last. Thankfully a very close shave and no permanant damage to Nerves or tendons but at least three works off work, while the minor opp has time to heal!
This afternoon I decided it was time to try and make up a honey super. I`ve had the wood and all the parts for a while in my shed but not had the time to put them all together. I have previously been occupied with getting swarm traps ready and now thats completed and 22 out of 25 are out, I am feeling as though I am catching up a bit!
The sizes are the same in overall width and breadth but the depth of a honey super is roughly half that of a Dadant 10 frame, only 17 cms deep.

I also fit a band or wood around the upper middle outside of the super. This is better than handles and allows easy moving and stacking . When they are full of honey they are very heavy indeed!
To make it a bit easier and quicker I already had one side of a hive ready made so I cut that in to two, making the two longest sides of the super and used slightly thinner ply for the two inner pieces of wood that support the honey supers. The other beauty of using ply for the inner pieces is that rather having to get the normal wooden sides rebated to take the frames, I was able to cut it to the desired depth with a hand saw and then use a chisel to just lift out the ply to the required depth.
All in all quite a good result for a couple of hours work. I will be using this super next week. I am intending to place this super in order that the bees draw up the frames so I can re use it for the sumer honey which is really the only type of honey as far as I am concerned.
It looks like the weather may be starting to warm up towards the beginning of next week. Fingers crossed. That should give the bees about 3 weeks of foraging in a good nectar flow from the oil seed rape. Up until now we have had the moisture but the daytime temperatures for the last 2 weeks have been between 11 and 15 degrees. Not nectar gathering weather!!!
Well I have a bit of time on my hands( so to speak) as I had an accident with a chainsaw the week before last. Thankfully a very close shave and no permanant damage to Nerves or tendons but at least three works off work, while the minor opp has time to heal!
This afternoon I decided it was time to try and make up a honey super. I`ve had the wood and all the parts for a while in my shed but not had the time to put them all together. I have previously been occupied with getting swarm traps ready and now thats completed and 22 out of 25 are out, I am feeling as though I am catching up a bit!
The sizes are the same in overall width and breadth but the depth of a honey super is roughly half that of a Dadant 10 frame, only 17 cms deep.

I also fit a band or wood around the upper middle outside of the super. This is better than handles and allows easy moving and stacking . When they are full of honey they are very heavy indeed!
 |
| Ply Inner sections. |
To make it a bit easier and quicker I already had one side of a hive ready made so I cut that in to two, making the two longest sides of the super and used slightly thinner ply for the two inner pieces of wood that support the honey supers. The other beauty of using ply for the inner pieces is that rather having to get the normal wooden sides rebated to take the frames, I was able to cut it to the desired depth with a hand saw and then use a chisel to just lift out the ply to the required depth.
All in all quite a good result for a couple of hours work. I will be using this super next week. I am intending to place this super in order that the bees draw up the frames so I can re use it for the sumer honey which is really the only type of honey as far as I am concerned.
It looks like the weather may be starting to warm up towards the beginning of next week. Fingers crossed. That should give the bees about 3 weeks of foraging in a good nectar flow from the oil seed rape. Up until now we have had the moisture but the daytime temperatures for the last 2 weeks have been between 11 and 15 degrees. Not nectar gathering weather!!!
 |
honey super with wax foundation on. |
Friday, April 13, 2012
Swarm Traps.- How to make them, where to place them.

Once you have got at least two drawn up combs in you five framed nuc ( the others being of foundation) you could call this a viable swarm trap but there`s still a couple more things you can do to maximise its attractiveness.
Lemon Grass Oil.
Bees seem to be attracted to many fragrances and indeed there is many a story of older or should I say "more experienced beekeepers" who have secret herbs or balms that they make up every 2 weeks to put in to swarm traps to aid the potency of the hive. However one of the most well known is lemon grass oil, or to be strictly correct its the oil from the plant "cymbopogon citratus." Put a few drops of this on some kitchen roll or tissue and then put this in to a small zip lock bag. Don`t fully close the bag, leaving just one corner not quite zipped up.
Bees will sense this and very soon check it out.
Nasanov
Nasanov is the natural feromone released by bees. It is used as a calling message to either draw other bees back to the hive or to a newly selected area away from the hive It comes from a gland underneath the bees front legs and when emitting this feromone bees tend to lean forward with their bottoms in the air and fan their wings, sending the scent out and away from them.
By putting Nasanov directly in to your swarm trap you are saying to the bees "come on in here, its ok"
You can buy nasanov in very small ampoules that can be hung on to the inside of one of your frames of drawn up comb. In france the cost about 1 euro each.
It dosent mean that hundreds of bees will suddenly start checking out the smell but the foragers will be very curious and hopefully combined with the smell of the drawn up comb and the old hive they will find this a perfect attraction.
Its always handy to have a spare amoule or two availible during the season. If you have been called to swarm in a place where is difficult to get to, then just put the nasanov in a trap or hive and within 20 mins or so you should see some results. Dont take risks when catching swarms. If the swarm likes your trap or nasanov they will soon move in to what you are offering.
Nasanov can be stored in the freezer untill needed.
Nasanov and Lemon grass oil together?
Well I dont know and haven`t been trapping bees long enough to say whether putting the two in the same trap offers any greather luring potential. Out of preference I would keep the Nasanov in the hive if you have it availible. On the outside of the hive I would dab a bit of lemon grass oil but not too much! and repeat this every 2 weeks if you can.
What actually happends when scout bees find your trap?
When scout bees are sent out to look for suitable places to make a new home in they will find your swarm trap, check it out ,remember where it is and report back to the colony and pass on this information. However its not just one bee returning with this information that would cause a colony to swarm to your trap.
Over the next few days, weeks, as the colony grows and spring "mass hatching" occurs, other scout bees will find the same trap and report back to the colony with the same information. As time of swarming approaches, these reports of the swarm trap are then re investigated by a growing number of scout bees who will increase their study of this possible site and then when the swarm is ready to issue and the number of reports of this possible home are all the same, the swarm will leave and go directly to the swarm trap, avoiding the need to settle on a nearby position.
The swarm thus goes straight to you trap in an orderly fasion ( as orderly as a swarm of bees can be) and the colony gets to work straight away.
I will add, that you might think you have a swarm already in your trap, as thers lots of bees seemingly coming and going, but often this is not the case and its scout bees constantly checking out their new proposed home.
I have witnessed this happening a good 5 days before a swarm arives and yes usually the more bees that are scouting out your trap, the bigger the swarm usually is.
Is not unusual to have as many as between 30 to 60 bees checking things out, with the higher numbers of scout bees showing their prescence the last and penultimte day before the swarm arrives.
They will also delay by a day or two if the weather goes rainy and cool, as they would at your own apiary!
I have also added lemon grass oil to the front of the hive if i see a few more bees than just the occasional one or two, that are present most of the summer. This seems to help increase the activity around the hive and i have never seen the reverse effect, so you have nothing to loose.
So If you see some bees around your trap and then a couple more the next day, it is likely that a swarm will issue in the next few days.
I have also had traps empty for almost a co plete seaso with no bees there at all, then on a routing check , sometimes only two or 3 days after, i have had a swarm establishd in the trap, but the majority of times you will see a build up of interest before a swarm takes residence.
Obviously if you see pollen being brought in then there is a swarm inside. Happy days!!!!!!
Trapping swarms from your Apiary
In the same way you can use this as an indicator by watching several swarm traps around your hives.This will give you a very good indication of a forthcoming swarm from your own hives. When you see a marked build up of bees coming and going from the swarm trap, its a pretty sure sign that things are about to happen.
I woulds place at least two traps around your own aipary and at a distance of at least 200 meters from your hives. This is shown to generally be the minimal distance bees like to swarm too. However I know someone who placed a nuc 20 meters from a nest in a tree and the nuc was occupied. But on the other hand was another swarm from somewhere else that came to the trap?
If you think you have caught a swarm , you see lots of bees coming and going but if you are not sure if it is a colony or just lots of inquisitive bees, then go back of an evening. If their are some bees walking up and down the front landing tray then its likely you have a swarm inside. The other way is to give the Nuc a sharp knock on the side walls. If you have a swarm you will hear a loud hiss from all the bees inside fanning their wings in alarm.
Dont repeat this as they will soon send out a reception party!.
If you are sure you have swarm and want to quickly have a look inside the nuc you will be very suprised just how docile the bees are in the first few days. I have frequently opened up a newly hived swarm with little of no reaction from the bees. This is because the queen has not started laying yet and bees have nothing to guard. They know they are more use to the queen and colony alive, so they are very conservative in the defence. This is a lovely time to get really close to your bees and just sit and watch.
Setting your Nuc
So you have spent all this time getting your swarm trap just how the bees will want it but where is the best place to put it?
After you have spent a few years beekeeping places to put your traps wont be difficult to find. You will get calls to get swarms and these places are where you want to put your traps. I had none of these places when I started but within a few years suddenly I have not got enough traps to my mind and I am putting out 25 this year. I found finding positions easy as I was fortunate with my job that I have many clients with all sorts of different gardens. If I saw bees there one season I would put a trap there the following and so on until I kind of begun to know the region I was in.
Its also improtant to say that even if you know the whereabouts of a bee tree or a chimney with a nest of bees in it, its by no means a guarantee that you wll catch a swarm in one season or that the bees will even swarm! So you have to spread your bets and put out more traps in different places.
In years of drought you will see many less swarms and in times of strong wet springs followed by warm summers you will see more swarms but even saying that its impossible to use that as a rule and many other factors determine when and why bees swarm.
Where to place your swarm traps.
The best position seems to be generally south to south west facing ( Northern hemisphere) and the height of about 1.5 to 2 meters from the ground. Try and place them so that they will get the sun for most of the day and best of all the sun from mid morning to late in the day as a preference. They seem to prefer the sun on the front of the hive as much as possible. Also try and place you swarm trap in a sheltered spot behind an existing building, garden wall ,on a granite window sill, so theres no prevailing wind. I also favour the use of old tin shed roofs. I am sure that the action of the heat rising from these metal roofs helps advertise the the presence of a hive, wafting the odour from the nuc up in to the air. Free advertising, go use it!!
Pests.
The only pest problems you will have with your un inhabited swarm traps are wax moth.
These are natures cleaners that in the wild will lay eggs in to old disused comb and when their larvae hatch out, they will happily munch their way through whatever they can, unfortunately for us that meany the lovely old comb that you have toiled so hard to present to a potential swarm of bees!
There is a treatement for this that is harmless to bees. You just simply spray the top halves of your frames with Bacillus Thuringensis . This spore stays on your frames until needed. If it comes in to contact with a larvae of a moth or caterpillar is starts in to growth, consuming it and quickly killing it.
If you dont treat your frames look at the picture below to see just how efficient they are. The middle old drawn up wax frame and they have moved on to the foundation.
Swarming Season.
Where we are in France (North Brittany) the swarming season lasts form the middle of April untill the middle of July but each region is different and obviously south of the equator its the reverse.
With all things in nature they are all subject to variation due to climatic differences.
If you get it right and the bees come to your trap then hopefully you will see something like this.
Happy swarm catching!

Swarm Traps.
How to make them , when and where to place them.
 |
| Swarm Trap located in a oak tree. |
Why do bees Swarm?

Bees usually swarm for a few reasons. The main reasons are as follows:
- Bees have a need to reproduce and they feel that conditions are right to do so. Very briefly, the queen oversees the production of queen cells. Just before several virgin queens emerge, she leaves with approximately half the colony and sets up a new home somewhere else, usually in a radius of between 200 meters and 3 kilometers from the mother colony.
- Bees in their own colony are overcrowded, classically due to spring honey, a large hatching of brood and an increase in foraging bees. This in turn will trigger their queen in to producing queen cells before she departs with about half the colony.
- Bees are currently not in a viable hive. It might be diseased or in a position that has not been chosen well or has been damaged due to an external force making the current hives position non viable.
Generally a colony of Bees will swarm due to one or two of the above reasons and its as simple as that!
Colonys in a small cavity generally will swarm more often than one in a large cavity. Queens in their first year are also less likely to swarm. In their second year, twice as likely to swarm and so on! The average life for most queens being 3 to 5 years old.
How do you catch a swarm.
Catching a swarm can be a tricky business. If your bees swarm from you aipiary then you may be luckily enough to find your bees temporarily resting on a branch or wall, gate post and hopefully at a convienient height. The majority of bees don`t behave like this and will go in you your neighbours back yard or a couple of hundred meters away, out of sight, in the top of a tree.
You may not even notice your bees have swarmed as you are working during the day when they swarmed. You have come past your apiary on your way home and see nothing out of the ordinary, as it looks like most of the bees are in your hive, where they should be at the end of the day!
Its not until you come to inspect your hive a few days later and see a few open queen cells, brood, no eggs and not many bees.
You have lost your prized queen that you bought for her honey producing qualities and you have lost her a couple of weeks just before the peak honey flow starts. How can this be avoided!
How do you stop your bees swarming!
There is much information on this issue . Really the main crux of beekeeping is swarm management. If you can manage your bees and reduce swarming, then you have really mastered beekeeping.
You can add honey supers to give you colonies more space and you can take out a brood frame in the extremities of our colony and spin them if they are full of honey. This will give your queens more space to lay in to but the eventual will happen. Your bees will swarm some time in their queens life.
You will begin to know when your bees are about to swarm. The obvious signs of large amount of brood hatching, the creation of swarm cells and change in the bees behaviour, to name but a few signs.
Some people like to use a phsyical control namly clipping the queens wings. I do not support this practice. It usually results in a messy ball of bees attempting to swarm but with a queen that cant fly. This is a completely unatural thing and results in very confused bees.
If you carry out as many swarm prevention measures as possible and then accept the fact that you will have to deal with a few swarms from your apiary each year you will be managing your bees in a much more natural way and have young stock to take over for the forthcoming years. So the question you are asking is ok but how do I catch the swarms that I might lose? The awnser is simple. You put out swarm traps.
Why put out swarm Traps?
I put out swarm traps for 2 reasons.
- To allow my colonies of bees to reach a point in their reproduction where they can swarm freely or they reach a point where they are all about to swarm.I will then go in and artificially swarm my bees . The difficulty in predicting when this is going to happen. Swarm traps help you predict when that time might be, and if you get it wrong, they are more than likely to go in to the trap, rather than choose another place. This generally happends when the necterflow reaches its peak after a warm wet period.
- To catch feral swarms that are natrually produced in the wild. These wild swarms are so important in relation to the gene pool we use in beekeeping today. These wild bees have to deal with all that naure can throw at them and yet they still manage to swarm and raise successful colonies.
What is a swarm Trap.
A swarm trap is basically any cavity or box that has been modified to offer a suitable residence for bees that are in the swarming mode. The box must be of an approximate size, have a small entrance that easily guarded, offer good access, have some ready drawn up comb in, that is clean and pest, disease and sugar/honey free, allowing the colonys queen to start laing within a few hours. The Smell is also important ie previously used nest of deserted colony or a well used Nuc box!
Build your nucs first: Click here:
What elements make a viable swarm trap.
Research shows that European honey bees prefer a cavity size of about 40 ltrs. Thats not to say that some bees won`t swarm in to a smaller or much larger cavity but the results of generally show that this volume is the most acceptable. Dont forget you may think a huge swarm has just gone in to a very small volume container but its going to be at least 21 days before any young bees are going to be produced and the size of the colony will probably decrease by 10 or 20 % before any new young start to hatch out.
Shape is not important but its stupid to make a swarm trap without thinking of how you can get out the swarm afterwards. Some comercial swarm traps availible on the market are of the lobster pot / papier mache design. Their design does attract swarms but if you are not around within 24hrs to shake your bees in to another suitable container or hive, then you are left struggling with a difficult cut out. This is a shame and its the last thing you want to do is give your lovely new colony a load of grief. The best swarm traps are basically used nucs and hives, though more so nucs, as they are more portable, lighter and less cumbersome to lug around. The other main benefit is that you can leave your swarm trap for 2 weeks or more if you wish, you may catch a swarm the second day after you put the trap out but the bees will start drawing out new comb and get on with establishing their new home
When you find you have caught a swarm you can then easily transfer it in to a new hive or nuc as they have built on to your frames that you just lift out. You can feed your bees easily, treat them agaist mites and generally manage the colony well.
How can you turn new nucs in to old ones
So you`ve just started beekeeping but dont have any old , used nuc boxes. Theres no point in putting out brand new ply nucs that have only been constructed the day before, you need to get them "hive smelly" to give them a realistic chance of working and there are 2 ways you can do this. The obviously most natural way is to transfer a colony of bees in to your nuc and leave it there for at least a couple of weeks. The other way I call "artificial propolisation."
Artificial propolisation.
Propolis is the glue that bees use within the hive to help keep the hive clean and it acts as a sterilant. It is a product from the buds of trees and shrubs. Bees scrape it off and then return to the hive and use it to close up holes in the hive, seal any open cracks etc. It has also been known to be used to seal over dead mamals that have died in the hive. You can buy propolis in mail order but thats quite expensive and really the quality is too pure.
The type of propolis you need is the propolis you would find inside an old hive, so what you need to do is first get hold of some well used honey supers. Most beekeepers will lend you some out of season. Just say you are cleaning them up for free and they will be more than hapy to loan them to you!
Next on a large clean table or sheet of ply start scraping out all the old propois and wax you can find. I find a good quality flat edged screwdriver is perfect for this. The most propolised areas are generally under the metal frame supports. One old honey super will give you half a jam jar full in no time.
Please be careful as you scrape all this out. You can easily slip with the screwdriver or hive tool!
Brush up what you have scraped out regularly. A lot of the debris comes out in a fine powder so be careful not to let it fall to the ground. Dont wear good clothes and be prepared to smell like a bee hive when you have finished. TIP: do this in the winter months, propolis goes hard and shatters more easily losing its stickyness!
 |
| Removing propolis and wax debris from honey Super. |
 |
| The scrapings ready for use. |
When you have collected up all the little bits that will also include bits of wood , wax as well as propolis. Find a large class jar (about 1 litre in Volume) and then you need to get hold of some very pure alochol. The best place to source this is your local chemist of Pharmacy and you will probably have to explain what you want it for! Try to get the alochol with a minimal odour content as its really important that you don`t taint your prepared hive with a different smell and defeat the whole object.
Next, Wearing old clothes, gloves and face protection , mix your hive scrapings and alochol about 1 to 1 in volume. You will soon see why I say wear gloves. The propolis very quickly dissolves in to the alochol. Put the lid back on to the contained and shake it for at least 10 minutes. Some of the larger propolis will take a fair bit of agitation to get it to dissolve. TIP: I like to drop in a couple of the kids marbles, it helps agitation within the jar.
Next get your nucs out and spread them over a piece of the garden or where you wont make a mess. Not on your clean garage floor, as you will stain it brown. Leave the nucs upright and open with the frame covers off. You are better off doing this outside in a well ventilated area.
The next stage it to paint the inside of your nucs with your liquid propolis solution. Don`t try and cover all the inside of your nucs. You will run out quickly as the aclohol will start to evaporate , add more alochol to keep it liquid and also if you find more in the bottom of the jar that has not dissolved but the main object is to keep the solution as thick as possible. Start by painting around and above the entranceway and then try and get some on the side and around the areas where the frame supports are and finally try and get some on the inside of the frame cover. Careful when you do this as its terrible stuff, sticks and stains on everything and is really volatile and flammable. TIP: bring the jar of alohol in to a warm room for a couple of hours to lift up the temperature of the solution, but never heat it up in a microwave or on the stove.
When you have completed this leave the treated nucs outside for a couple of days to really dry out. If you are doing this in mid spring you will already notice bees taking an interest in the inviting odours coming from your nucs.
To finish the treatment, I go over all the inside of my hive very lightly with a blowtorch. This heats up the surface enough to evaporate away and remaining smell from the alochol and adds a bit of burnt wood smell to the nuc It has been proven that bees dont really mind this and in nature this smell in common to bees.
What to put in your Nuc as the best attractant.
So you have now got an old nuc to make up as a swarm trap. Bees may well swarm in to this well scented box but there is still more you can do to make it more attractive. The first thing is to try and get hold of some old drawn up brood comb frames. These are really the one most inprotant thing that will excite scout bees more than anything! Pictured below is one of the frames I was left with last season, when a hive became queenless and I was unable to re queen. At the time I was annoyed but I know now that beekeeping is all about making use of what materials you have. If you loose a colony or two it will give you better chance of catching a swarm the following spring. If you look closely you will see old comb and lots of different pollen stored in the cells. Thats the best frames of all to use. Also you will notice no sugar or honey! Thats another key element you don`t want in the hive, as it attracts mice and other hungry insects not to mention wasps and hornets. Drawn up comb will also enable a queen to start laying within a few hours of arrival if conditions are right.
The best way to get drawn up brood comb except when you loose a colony is each spring when you open up your hives the bees will have normally emptied the extremities of the hive allowing you to remove 2 old drawn frames and replace them with two of just foundation. As the hive popuation increases in the spring these replacements will soon be drawn up by the need to expand the hive.
If you cant get sugar free drawn up comb you can use brood frames that have sugar stored in the cells but you must try and remove most this.
I find the best way is to do this is by scraping off the surface capings and then using a warm water wash with a fine, strong spray directed directly in to the frame this does do the trick, but water temperature is critical and it does use quite a lot of water. However needs must!!!! ps dont do this when your wife has just cleaned the kitchen. You won`t be the most popular member of the house.
I once asked my beekeeping teacher if I could buy a few of his old frames. They are not for sale I was told. drawn up frames are like hens teeth. Very rare!
 |
| Drawn up brood frame with pollen and no sugar or honey. |
Other Attractants.
Once you have got at least two drawn up combs in you five framed nuc ( the others being of foundation) you could call this a viable swarm trap but there`s still a couple more things you can do to maximise its attractiveness.
Lemon Grass Oil.
Bees seem to be attracted to many fragrances and indeed there is many a story of older or should I say "more experienced beekeepers" who have secret herbs or balms that they make up every 2 weeks to put in to swarm traps to aid the potency of the hive. However one of the most well known is lemon grass oil, or to be strictly correct its the oil from the plant "cymbopogon citratus." Put a few drops of this on some kitchen roll or tissue and then put this in to a small zip lock bag. Don`t fully close the bag, leaving just one corner not quite zipped up.
Bees will sense this and very soon check it out.
Nasanov
Nasanov is the natural feromone released by bees. It is used as a calling message to either draw other bees back to the hive or to a newly selected area away from the hive It comes from a gland underneath the bees front legs and when emitting this feromone bees tend to lean forward with their bottoms in the air and fan their wings, sending the scent out and away from them.
By putting Nasanov directly in to your swarm trap you are saying to the bees "come on in here, its ok"
You can buy nasanov in very small ampoules that can be hung on to the inside of one of your frames of drawn up comb. In france the cost about 1 euro each.
It dosent mean that hundreds of bees will suddenly start checking out the smell but the foragers will be very curious and hopefully combined with the smell of the drawn up comb and the old hive they will find this a perfect attraction.
Its always handy to have a spare amoule or two availible during the season. If you have been called to swarm in a place where is difficult to get to, then just put the nasanov in a trap or hive and within 20 mins or so you should see some results. Dont take risks when catching swarms. If the swarm likes your trap or nasanov they will soon move in to what you are offering.
Nasanov can be stored in the freezer untill needed.
Nasanov and Lemon grass oil together?
Well I dont know and haven`t been trapping bees long enough to say whether putting the two in the same trap offers any greather luring potential. Out of preference I would keep the Nasanov in the hive if you have it availible. On the outside of the hive I would dab a bit of lemon grass oil but not too much! and repeat this every 2 weeks if you can.
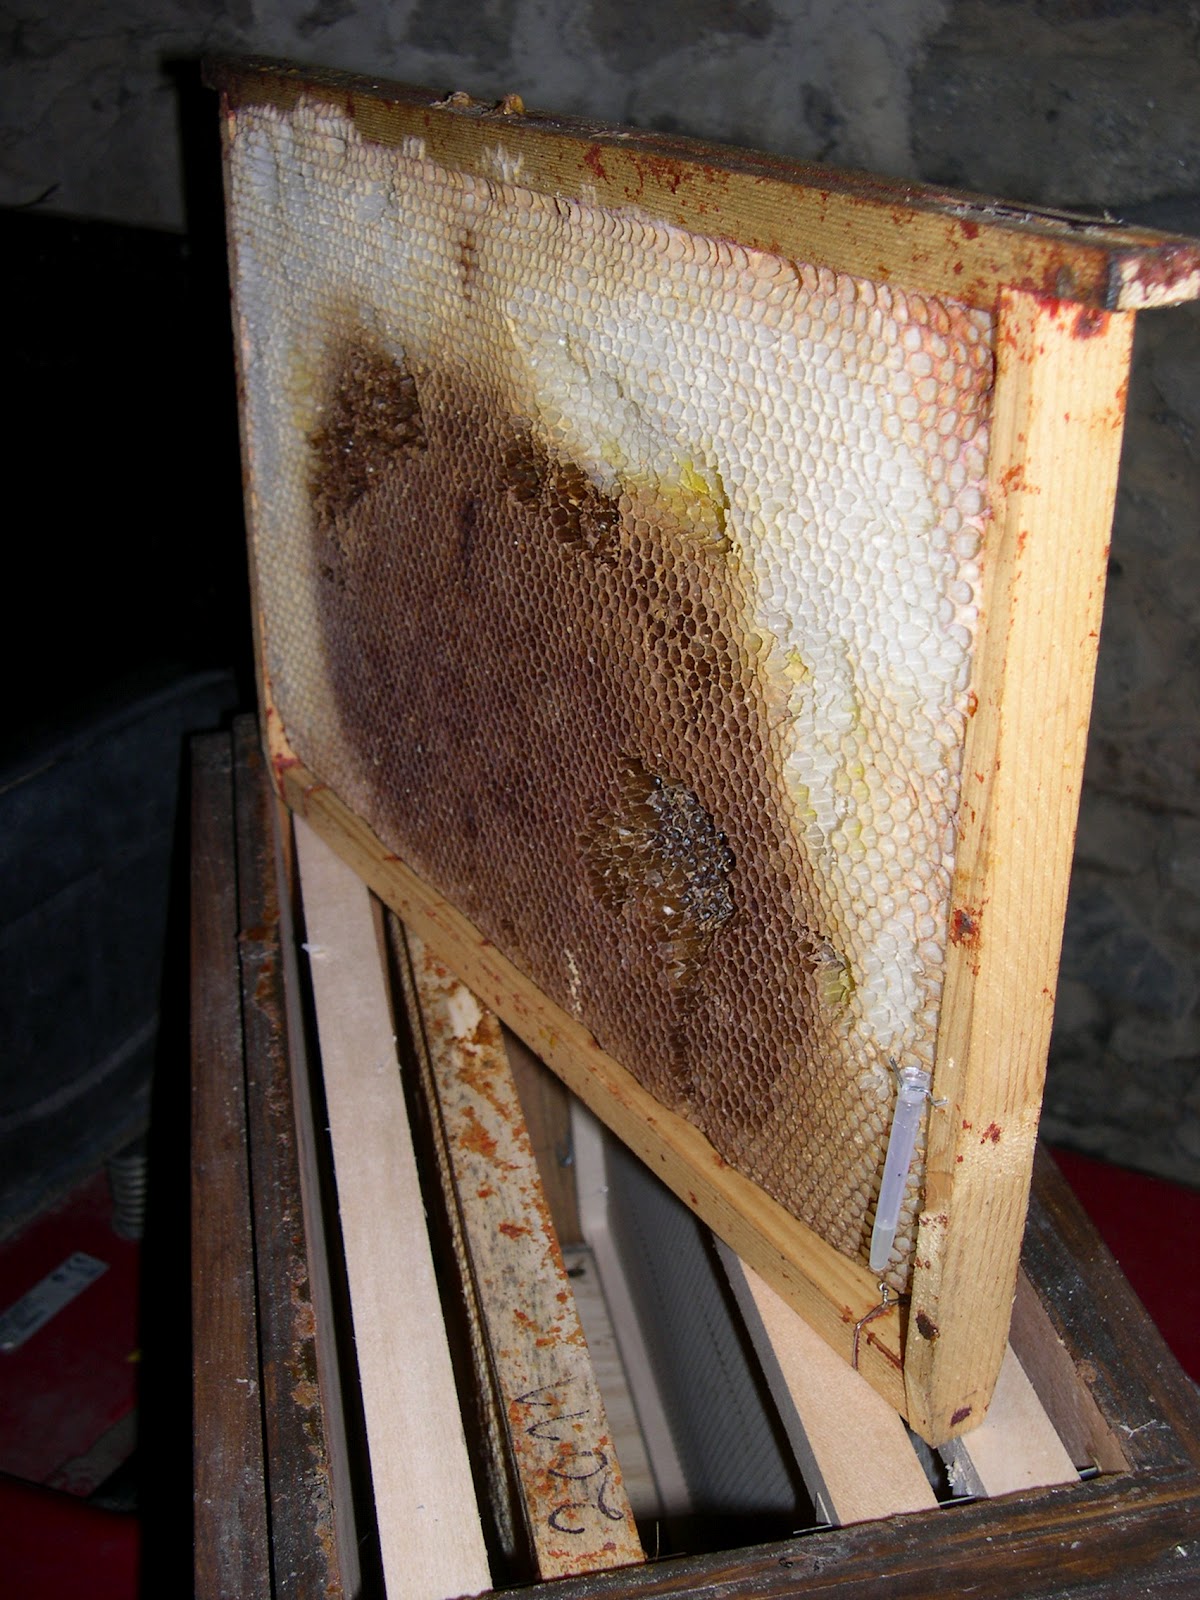 |
| Nasonov ampoule on the lower part of the middle frame |
What actually happends when scout bees find your trap?
When scout bees are sent out to look for suitable places to make a new home in they will find your swarm trap, check it out ,remember where it is and report back to the colony and pass on this information. However its not just one bee returning with this information that would cause a colony to swarm to your trap.
Over the next few days, weeks, as the colony grows and spring "mass hatching" occurs, other scout bees will find the same trap and report back to the colony with the same information. As time of swarming approaches, these reports of the swarm trap are then re investigated by a growing number of scout bees who will increase their study of this possible site and then when the swarm is ready to issue and the number of reports of this possible home are all the same, the swarm will leave and go directly to the swarm trap, avoiding the need to settle on a nearby position.
The swarm thus goes straight to you trap in an orderly fasion ( as orderly as a swarm of bees can be) and the colony gets to work straight away.
I will add, that you might think you have a swarm already in your trap, as thers lots of bees seemingly coming and going, but often this is not the case and its scout bees constantly checking out their new proposed home.
I have witnessed this happening a good 5 days before a swarm arives and yes usually the more bees that are scouting out your trap, the bigger the swarm usually is.
Is not unusual to have as many as between 30 to 60 bees checking things out, with the higher numbers of scout bees showing their prescence the last and penultimte day before the swarm arrives.
They will also delay by a day or two if the weather goes rainy and cool, as they would at your own apiary!
I have also added lemon grass oil to the front of the hive if i see a few more bees than just the occasional one or two, that are present most of the summer. This seems to help increase the activity around the hive and i have never seen the reverse effect, so you have nothing to loose.
So If you see some bees around your trap and then a couple more the next day, it is likely that a swarm will issue in the next few days.
I have also had traps empty for almost a co plete seaso with no bees there at all, then on a routing check , sometimes only two or 3 days after, i have had a swarm establishd in the trap, but the majority of times you will see a build up of interest before a swarm takes residence.
Obviously if you see pollen being brought in then there is a swarm inside. Happy days!!!!!!
Trapping swarms from your Apiary
In the same way you can use this as an indicator by watching several swarm traps around your hives.This will give you a very good indication of a forthcoming swarm from your own hives. When you see a marked build up of bees coming and going from the swarm trap, its a pretty sure sign that things are about to happen.
I woulds place at least two traps around your own aipary and at a distance of at least 200 meters from your hives. This is shown to generally be the minimal distance bees like to swarm too. However I know someone who placed a nuc 20 meters from a nest in a tree and the nuc was occupied. But on the other hand was another swarm from somewhere else that came to the trap?
If you think you have caught a swarm , you see lots of bees coming and going but if you are not sure if it is a colony or just lots of inquisitive bees, then go back of an evening. If their are some bees walking up and down the front landing tray then its likely you have a swarm inside. The other way is to give the Nuc a sharp knock on the side walls. If you have a swarm you will hear a loud hiss from all the bees inside fanning their wings in alarm.
Dont repeat this as they will soon send out a reception party!.
If you are sure you have swarm and want to quickly have a look inside the nuc you will be very suprised just how docile the bees are in the first few days. I have frequently opened up a newly hived swarm with little of no reaction from the bees. This is because the queen has not started laying yet and bees have nothing to guard. They know they are more use to the queen and colony alive, so they are very conservative in the defence. This is a lovely time to get really close to your bees and just sit and watch.
Setting your Nuc
So you have spent all this time getting your swarm trap just how the bees will want it but where is the best place to put it?
After you have spent a few years beekeeping places to put your traps wont be difficult to find. You will get calls to get swarms and these places are where you want to put your traps. I had none of these places when I started but within a few years suddenly I have not got enough traps to my mind and I am putting out 25 this year. I found finding positions easy as I was fortunate with my job that I have many clients with all sorts of different gardens. If I saw bees there one season I would put a trap there the following and so on until I kind of begun to know the region I was in.
Its also improtant to say that even if you know the whereabouts of a bee tree or a chimney with a nest of bees in it, its by no means a guarantee that you wll catch a swarm in one season or that the bees will even swarm! So you have to spread your bets and put out more traps in different places.
In years of drought you will see many less swarms and in times of strong wet springs followed by warm summers you will see more swarms but even saying that its impossible to use that as a rule and many other factors determine when and why bees swarm.
Where to place your swarm traps.
The best position seems to be generally south to south west facing ( Northern hemisphere) and the height of about 1.5 to 2 meters from the ground. Try and place them so that they will get the sun for most of the day and best of all the sun from mid morning to late in the day as a preference. They seem to prefer the sun on the front of the hive as much as possible. Also try and place you swarm trap in a sheltered spot behind an existing building, garden wall ,on a granite window sill, so theres no prevailing wind. I also favour the use of old tin shed roofs. I am sure that the action of the heat rising from these metal roofs helps advertise the the presence of a hive, wafting the odour from the nuc up in to the air. Free advertising, go use it!!
Pests.
The only pest problems you will have with your un inhabited swarm traps are wax moth.
These are natures cleaners that in the wild will lay eggs in to old disused comb and when their larvae hatch out, they will happily munch their way through whatever they can, unfortunately for us that meany the lovely old comb that you have toiled so hard to present to a potential swarm of bees!
There is a treatement for this that is harmless to bees. You just simply spray the top halves of your frames with Bacillus Thuringensis . This spore stays on your frames until needed. If it comes in to contact with a larvae of a moth or caterpillar is starts in to growth, consuming it and quickly killing it.
If you dont treat your frames look at the picture below to see just how efficient they are. The middle old drawn up wax frame and they have moved on to the foundation.
 |
| Wax Moth Damage! |
Where we are in France (North Brittany) the swarming season lasts form the middle of April untill the middle of July but each region is different and obviously south of the equator its the reverse.
With all things in nature they are all subject to variation due to climatic differences.
If you get it right and the bees come to your trap then hopefully you will see something like this.
Happy swarm catching!

Saturday, March 31, 2012
Transfering from overwintering nucs to brand new nucs.
Well the weather has been exceptional for the bees over the last few days here in Brittany. Apart from the cool mornings with some low mist, we have had daytime temperatures of 20 degrees. For March this is exceptional. The weather has also been calm making the job of flying a whole lot easier.
There is also a huge amount of food availible. The Salix I talked about a couple of weeks ago is now at its peak, with other trees like sloe (or blackthorn) starting to flower.. For the bees spring has sprung!
Yesterday I has finished work a little earlier and took the opportunity to transfer some of my overwintering nucs, to brand new nucs. The reason for this is simple. I needed the old nucs for swarm traps this year and have plenty of new spare nucs but not enough old smelly nucs that are gummed up with propolis and have been well used. Thats whats more likely to attract a swarm.
All of my nucs are 5 framed Dadant, so the transfer was very simple. The weather being so good meant I needed very little smoke from my smoker. The bees were in an exceptionally good mood, with not a single attempt to sting ,which makes the job a whole lot easier.
My method is simple and traditional. I move the origional nuc of its stand and put it foreward by about 1 meter on the floor . I put the brand new nuc in its place and then turn the old nuc around and rest the front lip / landing strip on the other nucs entrance allowing a clear passage of bees not transfered on frames, to walk in to the hive as nothing had happened.
One thing to note is you should always keep your frames in the correct order even if you are transfering in to a larger hive from a nuc. An upset in the brood pattern can cause the queen to slow laying or the colony to stop working as well, until things are re aranged. This is damaging to the spring build up and should be avoided at all costs.
I also always start removing frames from the side of the colony that has the least amount of brood or drawn up comb. A nuc in early spring may well have only the two centre frames completly drawn up and the two or three surrounding frames are sometimes incomplete allowing you to use this to remove the side frames first ( whichever is the smallest) and allowing you room to ease the middle frames apart carefully and not just yank then up and out from the middle damaging the colony, bees and Queen in the worst case senario. ( and above all really hacking them off!) The general numbers of bees this time of year are low but now on the rise. This year it will be another 3 weeks to a month before they are ready to be transfered to normal sized hive .
All of my colonies have nearly doubled in sized since I last treated them ( nearly 2 weeeks ago) but there is still a long way to go. We are forecast cooler ( more normal) weather for the next few days so I think we will see a rebalancing of things weather wise! The bees wont be bothered too much. Looking at their frames yesterday theres plenty of pollen and nectar/ loose honey stored away in preparation for a cooler spell.
What we will need more of is rain. We are already in a period of drought continuing from last year. We had some winter rains but nothing like we should have had. Normally we get regular amounts of rain until june but this year, like last year looks as though we are going to see a repeat,. Good spring build up with good weather and plenty of spring honey( but most of thats oil seed rape)and hardly any summer honey that crystalises in the frames, (due to lack of moisture) between mid june to mid july during the flowering of the chestnut trees.
Because of this I am going to take a bit of spring honey this year, just in case I end up with nothing at the end of August but I must not be too negative. Its still only march and there is still moisture in the soil. All to often we see this pattern and then it stays wet for months!
Queenless Nuc.
Regarding that nuc that was queenless and noisy during my last visit, well its good news. There is a new queen ruling the roost but no eggs yet! The bees had completly changed their behaviour, I found her hiding on the last frame I transfered in to a new nuc. She was not as large as most queens however there a lot that could attribute to that. She may have only just hatched or not completer her mating yet. She may also not have found enough drones to mate with. I will leave her another 2 weeks and if she dosent start laying I will combine the colony with another 5 framed Nuc, in to a 10 frame colony, which will give a good sized colony very quickly in time for some spring honey. The two queens will find each other and battle it out untill one remains. The strongest remaining queen will then reside and quicklyget egg laying under way!
Enjoy the weather.

There is also a huge amount of food availible. The Salix I talked about a couple of weeks ago is now at its peak, with other trees like sloe (or blackthorn) starting to flower.. For the bees spring has sprung!
Yesterday I has finished work a little earlier and took the opportunity to transfer some of my overwintering nucs, to brand new nucs. The reason for this is simple. I needed the old nucs for swarm traps this year and have plenty of new spare nucs but not enough old smelly nucs that are gummed up with propolis and have been well used. Thats whats more likely to attract a swarm.
All of my nucs are 5 framed Dadant, so the transfer was very simple. The weather being so good meant I needed very little smoke from my smoker. The bees were in an exceptionally good mood, with not a single attempt to sting ,which makes the job a whole lot easier.
My method is simple and traditional. I move the origional nuc of its stand and put it foreward by about 1 meter on the floor . I put the brand new nuc in its place and then turn the old nuc around and rest the front lip / landing strip on the other nucs entrance allowing a clear passage of bees not transfered on frames, to walk in to the hive as nothing had happened.
One thing to note is you should always keep your frames in the correct order even if you are transfering in to a larger hive from a nuc. An upset in the brood pattern can cause the queen to slow laying or the colony to stop working as well, until things are re aranged. This is damaging to the spring build up and should be avoided at all costs.
I also always start removing frames from the side of the colony that has the least amount of brood or drawn up comb. A nuc in early spring may well have only the two centre frames completly drawn up and the two or three surrounding frames are sometimes incomplete allowing you to use this to remove the side frames first ( whichever is the smallest) and allowing you room to ease the middle frames apart carefully and not just yank then up and out from the middle damaging the colony, bees and Queen in the worst case senario. ( and above all really hacking them off!) The general numbers of bees this time of year are low but now on the rise. This year it will be another 3 weeks to a month before they are ready to be transfered to normal sized hive .
All of my colonies have nearly doubled in sized since I last treated them ( nearly 2 weeeks ago) but there is still a long way to go. We are forecast cooler ( more normal) weather for the next few days so I think we will see a rebalancing of things weather wise! The bees wont be bothered too much. Looking at their frames yesterday theres plenty of pollen and nectar/ loose honey stored away in preparation for a cooler spell.
What we will need more of is rain. We are already in a period of drought continuing from last year. We had some winter rains but nothing like we should have had. Normally we get regular amounts of rain until june but this year, like last year looks as though we are going to see a repeat,. Good spring build up with good weather and plenty of spring honey( but most of thats oil seed rape)and hardly any summer honey that crystalises in the frames, (due to lack of moisture) between mid june to mid july during the flowering of the chestnut trees.
Because of this I am going to take a bit of spring honey this year, just in case I end up with nothing at the end of August but I must not be too negative. Its still only march and there is still moisture in the soil. All to often we see this pattern and then it stays wet for months!
Queenless Nuc.
Regarding that nuc that was queenless and noisy during my last visit, well its good news. There is a new queen ruling the roost but no eggs yet! The bees had completly changed their behaviour, I found her hiding on the last frame I transfered in to a new nuc. She was not as large as most queens however there a lot that could attribute to that. She may have only just hatched or not completer her mating yet. She may also not have found enough drones to mate with. I will leave her another 2 weeks and if she dosent start laying I will combine the colony with another 5 framed Nuc, in to a 10 frame colony, which will give a good sized colony very quickly in time for some spring honey. The two queens will find each other and battle it out untill one remains. The strongest remaining queen will then reside and quicklyget egg laying under way!
Enjoy the weather.
Queen bee on frame about 2 cms in front of my glove.

Wednesday, March 21, 2012
Final spring treatment completed.
Finally managed to get in to my hives today. The weather had been really poor for the last few days making the second and third treatments against varolla mite difficult to administer on time. Its better to treat 3 times every 7 days to break the cycle of the mites as the young mites hatch out. Well thats the theory. Unfortunately spring weather is very unpredictable here so the remaing 2 treatments were 9 and 10 days apart but the numbers of brood were low so hopefully it will of had the required effect.
Something to note was when I opened one of my nucs that was a swarm from last year I noticed that it sounded different to the others. It was much noisier which in my experience can be one of the signs that the hive was queenless.
Indeed it was! . On quick closer inspection there were no eggs or larvae but still some brood on three frames which must mean that the queen died (stopped laying) about 2 weeks ago or just after my second treatment. fortunately the bees knew this and immediately have constructed 2 queen cells ( in the middle of the frame) and have sealed each queen cell. Hopefully with warmer temperatures for the next week this will precipitate a sucessfull hatching but the real problem ahead is that as it is so early in the year will there be enough drones around for her to sucessfully mate with? Time will tell. I will leave them alone for another 3 weeks and see what happends!!

Something to note was when I opened one of my nucs that was a swarm from last year I noticed that it sounded different to the others. It was much noisier which in my experience can be one of the signs that the hive was queenless.
Indeed it was! . On quick closer inspection there were no eggs or larvae but still some brood on three frames which must mean that the queen died (stopped laying) about 2 weeks ago or just after my second treatment. fortunately the bees knew this and immediately have constructed 2 queen cells ( in the middle of the frame) and have sealed each queen cell. Hopefully with warmer temperatures for the next week this will precipitate a sucessfull hatching but the real problem ahead is that as it is so early in the year will there be enough drones around for her to sucessfully mate with? Time will tell. I will leave them alone for another 3 weeks and see what happends!!
Honey Bee on Camelia shrub. A rich source of early pollen!

Friday, March 2, 2012
First Inspection of the year.
First look at the hives after the winter.
Well the weather was perfect. 15 degrees ,sunny and calm. I was a bit early to give the first inspection of the year( 29th Feb) but I couldnt resist it.
It took me a little while to get my smoker going as the grass I had only the grass I cut last year to use but with the help of my trusty blowtorch I had the smoker puffing away well.
I wanted to take a good look at each fame in each hive, to check for signs of disease but also to acertain the amount of brood and eggs in each hive.
Overall I was very happy. No chalk brood or signs of foul brood and I saw many of the queens principally because the amount of brood and eggs was so small that the queens were more than likely to be on the one frame that they have been laying in to.This seemed the case for all my hives.
The reason for the small amount of brood and was probably because the autumn carried on later this year and the queens didn' really stop laying until the recent cold spell we had 3 weeks ago. So with this recent warmer weather they have started re laying but cautiously, incase the sudden increase in pollen stops!
I fed all my 10 frame hives with half a litre of sugar syrup to help stimulate the queens in to increasing egg laying. I also treated with amitraze which treats against varolla mite.
I will be quickly opening the hives twice more to give a second and third treatment over the next two weeks and also feeding at the same time. However I will not be pulling the hive apart each time. I know their is brood and eggs in each hive so I will leave them well alone an keep the intervention minimal.
Let's hope the weather dosent turn cold again!
Roll on spring.
Well the weather was perfect. 15 degrees ,sunny and calm. I was a bit early to give the first inspection of the year( 29th Feb) but I couldnt resist it.
It took me a little while to get my smoker going as the grass I had only the grass I cut last year to use but with the help of my trusty blowtorch I had the smoker puffing away well.
I wanted to take a good look at each fame in each hive, to check for signs of disease but also to acertain the amount of brood and eggs in each hive.
Overall I was very happy. No chalk brood or signs of foul brood and I saw many of the queens principally because the amount of brood and eggs was so small that the queens were more than likely to be on the one frame that they have been laying in to.This seemed the case for all my hives.
The reason for the small amount of brood and was probably because the autumn carried on later this year and the queens didn' really stop laying until the recent cold spell we had 3 weeks ago. So with this recent warmer weather they have started re laying but cautiously, incase the sudden increase in pollen stops!
I fed all my 10 frame hives with half a litre of sugar syrup to help stimulate the queens in to increasing egg laying. I also treated with amitraze which treats against varolla mite.
I will be quickly opening the hives twice more to give a second and third treatment over the next two weeks and also feeding at the same time. However I will not be pulling the hive apart each time. I know their is brood and eggs in each hive so I will leave them well alone an keep the intervention minimal.
Let's hope the weather dosent turn cold again!
Roll on spring.
Monday, February 27, 2012
How to Build a Dadant Five frame Nucleus Hive or Ruchette.
The Parts.
I have taken a picture of all the parts that I use to construct this 5 frame Dadant Nuc hive, The parts are all easy to get hold of but more difficult if you wish for example to use scrap ply wood.
I go to my local dump when I am dumping green waste, which for me is usually two or three times a week, so for me I am lucky. If you dont have a resourse of recycled tymber or ply you will just have to buy some but its still usually cheaper to make 1 or 2 nucs than buy them off the shelf but worth checking out and comparing the costs. You may find if you make as many as you can get out of a sheet of ply, you get better value for money.
The best thing about making your own it that you generally get a better product at the end that will last you a lifetime if you make it correctly.The "off the shelf " ones are not a patch on the ones you will make yourself.
See the video here part one (added Jan 2014)
Part two.
Parts needed for nuc box construction

I use 16mm ply for the for the main box construction. The ply should be "WPBP" grade, which stands for weather proof, boil proof. This should ensure that the box will not warp or split if it gets wet. You can use ply that is also graded as "MR "which meanse moisture resist but you will need to treat the nuc with PVA sealer or similar, to give it more durability.
It is aslo important to say at this stage that you should never treat the inside of your nucs and hives with any kind of timber preservative. All the treatement you need can be applied to the exterior of the box when you have finished the construction this will therefore have no impact on what goes on in the hive.
List of parts and dimensions for construction.
Enough 16mm ply to cut to the following sizes (all sizes in cms)
2 x 48 x 32.5 ( for the two sides)
2 x 30 x 20 ( for the two ends)
2 x 23 x 10 ( for the two handles each end)
1 x 23 x 51.5 ( for the base)
1 x 23 cm x 16mmx16mm quadrant For the front lip on the wooden base
1 x front door in metal 23 x 3.5
2 small eyelets to secure the front door
6 eyelets and penny washers to secure the base to the main hive body.
Enough wood to make a lip around he top of the nuc to suport the lid.
10 to 16 mm ply to make the lid for the box and enouch 10 mm ply to cover this afterwards.
1 sheet of thin alluminium for covering the lid of the box.
4mm x 35mm Screws for the main construction.
How to
Cut the six main pieces that make up the hive body. Tip:If you dont have a workshop and are cutting on a makeshift bench by hand, take care to at least get each pair exactly the same size. This makes the fitting together so much easier.

With glue and screws join the two end pieces to one of the sides ( as per the photo and when this is done, flip it over and then complete the basic shape by adding the other side. Its a little tricky to get the first end and sidepieces to hold while you drill and screw. Once you have got the first screw in you, will find that this will hold the rest together as you complete the basic shape. Make sure the two ends are fitted to either the upper or lower section of one of the sides, not one upp and one lower!! i have done this a few times doh!!! (as per the picture below!)

Next fit the two handle end pieces to the upper end of each side.

And yes, when you fix on the handle that leaves the correct gap for the frames to go when dropped in to the hive body afterwards. Its that easy!!
Wipe any glue away as you complete the initial construction. You should now have the basic shape completed .
Next, decide which end you wish to have the door ( you may have used some ply thats not the best finish on it so choose the best looking end!)
Draw line 2 cm in height across the base of where the door will be . Then simply with a jig saw cut out the "u "shaped piece of wood starting and finishing from aproximately 1 cm in from each end. Dont forget that each end where you start and finish cutting there may be some screws holding the box together, screwed in from each side. Jigsaw blades dont like these!!
Nuc with entrance cut out

Next turn the whole nuc upside down and fit the base section. This should overhang the entrance door you have just cut and finish flush with the rear of the nuc. I like to fix the base down with eyed fixings. ( the same type you would put in your garden wall to tie in your garden plants). This enables you to unscrew your base if you need to clean it in the field. It makes the job so much easier. I also use penny washers between the base and the bottom of the eye hook as it gives you a really tight finish.
Tip: Pre drill the holes first or the ply could split!
Tip: Pre drill the holes first or the ply could split!

Next fit the small quadrant piece to the front of the Nuc entrance. Dont worry if you have the wrong size quadrant. Its the finish on the top that is important. This picture taken from underneath shows a difference in height between the base and the quadrant but its not a problem and you wont see it when you turn the Nuc over.
As previously when fitting the quadrant pre drill the holes with a 1 or 2 mm drill bit and use glue and panel pins to fix in position.

Quadrant fitted to base. Leave dry before you trim off the ends !

Next flip the box back over and fit the two pieces of scrap wood to the base as in the picture below.
Do not worry about this wood being good quality. These feet are really "sacrificial" and will support the nuc well. This shape also fits well in to different roof structures if you are using the nuc as a swarm trap.

Tip: Don`t extend the feet too far towards the front of the nuc. Ensure they finish about 10cm back from the edge of the landing strip. When you are doing a transfer to a hive or another nuc, this lip will enable you to rest the nuc on the entrance of the new hive and allow the remaining bees to walk in to their new home, making it seamless and smooth!

Next, fit a band of wood around the top of the hive . I use 18 x 21 mm strip pine or similar but its not too important as long as the size will match up with the size of the lid you are making later. The key thing is to ensure you create a rim of about 1cm depth minimum. This will give the lid a good base to sit on and not blow off with the first gale that passes!

Ok, so the basic construction is now complete. Its a good time to give everything a good rub down with sand paper, about 80 grit and again with about 120 grit , but dont go mad its not a chippendale finish you are after.

Next fit the two metal bands that support the frames.Tip: you may not need these spacer bands if you are making a nuc for american or british use ie langsdroth and british national hives have their own supports on the frames. Have a empty dadant frame handy when fitting and just ensure that when you finally nail the supports in place there is a good 8mm gap between the top of your frame and the eventual position of the lid of the nuc. This will allow your bees to move around the hive and crawl over the top of the frames . I use cut 14 mm cut brads as panel pins are too small for the holes already cut in to the metal supports.

Next with a empty, unwired, un waxed frame placed in to position in the hive, draw a line either side to mark the natural position of each frame in the hive.Tip: press this down firmly to ensure it well in to position!!
When you have done this for all five frame positions the using a small set square placed in the hive draw a paralell line through all these marks at about 10 cms up from the base of the inside of the hive. This will give you the correct position to hammer in your "U" shaped wire fixings that when in position will stop the frames in the hive moving from side to side if the hive is knocked or moved by accident. The result of this movement of these supports will cause bees to get squashed, set of a chain reaction of distress feromones released within the hive but also in the worse case senario kill or damage the Queen.

Frame wire supports in position

Next cut out from some clean scrap ply the top frame cover for the nuc box. Ideally you should make the length and bredth of this about 1 or 2 mm smaller than the top of the nuc. This helps when taking the lid on and off and also helps againts knockng the lid when removing it and disturbing the bees. Some recent research suggests that the thickness of frame cover for all bees is important. Certainly for heat loss reduction in the winter months but also for noise reduction within the hive. Try and use at least 10 mm ply.
Draw a line from corner to corner on one side. This will mark the centre of the lid.
Then with a hole cutter, cut out a centre hole with diameter about 6 to 8 cm . This will be your feeder hole. It needs to be this size to allow a steady passage of bees to and from a feeder. Any smaller and a queue can form and this is just wasted time for the bees.
Draw a line from corner to corner on one side. This will mark the centre of the lid.
Then with a hole cutter, cut out a centre hole with diameter about 6 to 8 cm . This will be your feeder hole. It needs to be this size to allow a steady passage of bees to and from a feeder. Any smaller and a queue can form and this is just wasted time for the bees.

Sand the inside of the hole on the frame cover on both sides, then also sand the small disc that came out of your hole cutter when you made your hole in the frame cover.
Find another scrap of ply left over from cutting the lid approx 10 x 10 cms is ideal. Then glue and pin the disc of wood from the hole cutter to this.
You have now created your lid and feeder hole!

Feeder hole with plug in situ on top of the frame cover.

Painting
Now its time to give all the hive a good paint. I like to use a water based exterior wood stain. It is harmless to bees when dry, water washable and really easy to apply. You can just wrap the used brush in a plastic bag between coats and that stops it drying out. I find that usually 2 coats is sufficient. Be a bit liberal when painting the landing strip in front of the doorway. This is really the only piece that may have a small amount of water on it from time to time. I like to paint the top lip of all my ply edges but that still doesn't allow any paint to be on the inside of the hive when its being used by the bees. Dont forget to paint the undereath. It really will help everything last for a lot longer.
Now its time to give all the hive a good paint. I like to use a water based exterior wood stain. It is harmless to bees when dry, water washable and really easy to apply. You can just wrap the used brush in a plastic bag between coats and that stops it drying out. I find that usually 2 coats is sufficient. Be a bit liberal when painting the landing strip in front of the doorway. This is really the only piece that may have a small amount of water on it from time to time. I like to paint the top lip of all my ply edges but that still doesn't allow any paint to be on the inside of the hive when its being used by the bees. Dont forget to paint the undereath. It really will help everything last for a lot longer.
When the paint is dry you can fit the door and put any numbers on you may need. Its always a good idea to mark any Nucs up with either simple numbers or letters. You may think you will remember which one is which but you wont when really need to!
I get my numbers and letters from my local car garage. They are a by product of number plate production.
They are metal, very long lasting, reflective and perfect produce again for free!

Making the lid.
If I am making more than 1 or 2 lids I like to cut off a load of strips with my skill saw. It makes making the lids less of a labour, especially when you have got this far. The lid depth should be at least 10 cm. This means that when it sits on the top of the hive you have aproximately 8 cms plus of space between the frame cover and the inside of the lid roof. This is purley so that you are able to feed your bees and leave the lid in situ. You may want to make some very shallow lids so the hive isnt so tall when transporting or using as a swarm trap but its really your own preferance.
I fix my lids together with screws at each end. Construct the lid frame on a flat work surface ensuring that as the lid is constructed, you have one side of the lid perfectly evenly joined. This is the side that will be closing to the hive. The other side is to be covered in ply and doesnt have to be oh so perfect. I dont even bother glueing my lids together. Dont forget that when you cover the lid frame with ply you are giving a lot of extra strength to the whole thing. Use any old scraps of ply, it really does not matter what you use. Even orange painted old cupboard doors. any scrap, just try to give it a bit of thickness sround the 10mm size.

When you have covered the lid in ply, you are ready to paint up the lid. Be sure you paint up all the joins and cuts in the ply well. These are the places where water will ingress during the long winter months. Remember the lid will not come in to contactwith the bees so paint it well, also remembering that about a third from the top lid down will not actually need painting because you are going to cover that part with your water proofing material.
I like to use a thin alluminium sheet, that is a by product from the printing industry. The trouble is sourcing the sheets. I got a load from my local printers but glad i did because the machine has now been scrapped. However I have seen the same sheets for sale at bee keeping shops. You can use roofing felt but this can heat the hive too much in the summer months. The thing with metal sheets is that they are light, quick to fit, reflect the sun and also dont break down. They will last the lifetime of the hive. You may pay slightly more for them but they are by far the best product. If you have access to and are a good fiber glass resin user then I think that that would also be a good choice of material but I| think also the the resin would give of an odour for the first couple of year so thats something to consider.
Fit the metal sheet by cutting it to shape first with a stanley knife and a good straight edge.
You only have to score to sheet to cut it , then bend it back and forth and it easily breaks along the desired lines. Centralise the sheet and then bend it in to place over the edge of a work bench. I also find a rubber hammer is a good tool as well. Cut and fold the ends as though you were wrapping a present. You are not going to get perfect joints the first time you do this as it does take a little practice. Watch your finger, its all sharp and the classic DIY accident waiting to happen!!!
You only have to score to sheet to cut it , then bend it back and forth and it easily breaks along the desired lines. Centralise the sheet and then bend it in to place over the edge of a work bench. I also find a rubber hammer is a good tool as well. Cut and fold the ends as though you were wrapping a present. You are not going to get perfect joints the first time you do this as it does take a little practice. Watch your finger, its all sharp and the classic DIY accident waiting to happen!!!
I use 10 mm staples to secure the roof to the lid. The staples may not go all the way home when fixing but you can give them a little tap with a hammer to tidy them up. you can also use small galvanised felt roofing nails.
The Completed Nuc

I will be explaining how to change one of these in a viable swarm trap in my next blog. Its very simply but again the attention is in the detail! Wild swarms are few and far between but you will stand a good chance of catching one if you follow a few simple steps. You can also use a swarm trap in the close vicinity of your own apiary. This will help protect you against losing a swarm. I hopefully will be posting that in a couple if weeks. Good luck in you Nuc Construction.

Subscribe to:
Posts (Atom)